# Create a NixOS Flake and Deploy it on Flakery
In this tutorial, we will create a basic NixOS flake and deploy it on Flakery.
# Prerequisites
Before you begin, you will need to have the following installed:
# Create your project directory and initialize a flake
To create a new flake, you can use the nix flake init command. This will create a new directory with a flake.nix file.
mkdir basic-flake
cd basic-flake
nix flake init
2
3
you will now have a flake.nix file in your simple-flake directory.
{
  description = "A very basic flake";

  inputs = {
    nixpkgs.url = "github:nixos/nixpkgs?ref=nixos-unstable";
  };

  outputs = { self, nixpkgs }: {

    packages.x86_64-linux.hello = nixpkgs.legacyPackages.x86_64-linux.hello;

    packages.x86_64-linux.default = self.packages.x86_64-linux.hello;

  };
}
2
3
4
5
6
7
8
9
10
11
12
13
14
15
first, lets add an input to this flake that will import the flakery nixos module.
{
  description = "A very basic flake";

  inputs = {
    nixpkgs.url = "github:nixos/nixpkgs?ref=nixos-unstable";
    flakery.url = "github:getflakery/flakes";
  };

  outputs = { self, nixpkgs, flakery }: {

    packages.x86_64-linux.hello = nixpkgs.legacyPackages.x86_64-linux.hello;

    packages.x86_64-linux.default = self.packages.x86_64-linux.hello;

  };
}
2
3
4
5
6
7
8
9
10
11
12
13
14
15
16
now we can add the flakery module to our flake.
{
  description = "A very basic flake";

  inputs = {
    nixpkgs.url = "github:nixos/nixpkgs?ref=nixos-unstable";
    flakery.url = "github:getflakery/flakery";
  };

  outputs = { self, nixpkgs, flakery }: {

    nixosConfigurations.hello-flakery = nixpkgs.lib.nixosSystem {
      system = "x86_64-linux";
      modules = [
        flakery.nixosModules.flakery
      ];
    };

  };
}
2
3
4
5
6
7
8
9
10
11
12
13
14
15
16
17
18
19
now that we have added the flakery module to our flake, we can build our system. Lets add a new line to our flake to import a configuration.nix file
{
  description = "A very basic flake";

  inputs = {
    nixpkgs.url = "github:nixos/nixpkgs?ref=nixos-unstable";
    flakery.url = "github:getflakery/flakery";
  };

  outputs = { self, nixpkgs, flakery }: {

    nixosConfigurations.hello-flakery = nixpkgs.lib.nixosSystem {
      system = "x86_64-linux";
      modules = [
        flakery.nixosModules.flakery
        ./configuration.nix
      ];
    };

  };
}
2
3
4
5
6
7
8
9
10
11
12
13
14
15
16
17
18
19
20
now we can create a configuration.nix file in our simple-flake directory.
{ config, pkgs, ... }:
let
  flakeryDomain = builtins.readFile /metadata/flakery-domain;
in
{
  system.stateVersion = "23.05";

  services.caddy = {
    enable = true;
    virtualHosts."${flakeryDomain}".extraConfig = ''
      respond "Hello, world!"
    '';
  };
  networking.firewall.allowedTCPPorts = [ 80 443 ];
}
2
3
4
5
6
7
8
9
10
11
12
13
14
15
now that we have added a configuration.nix file to our flake, we can generate a flake.lock to pin our flake to a specific version of nixpkgs and flakery.
nix flake lock
# Create a git repository and push your flake
Initialize a git repository and create an initial commit.
git init
git add .
git commit -m "initial commit"
2
3
Create a new repository on GitHub (opens new window) and push your flake to the repository.
git branch -M main
git remote add origin git@github.com:getflakery/basic-flake.git
git push -u origin main
2
3
TIP
Replace git@github.com:getflakery/basic-flake.git with your repository URL.
Now that you have created a flake and pushed it to a git repository, you can deploy it on Flakery.
# Deploy your Nixos Flake on Flakery
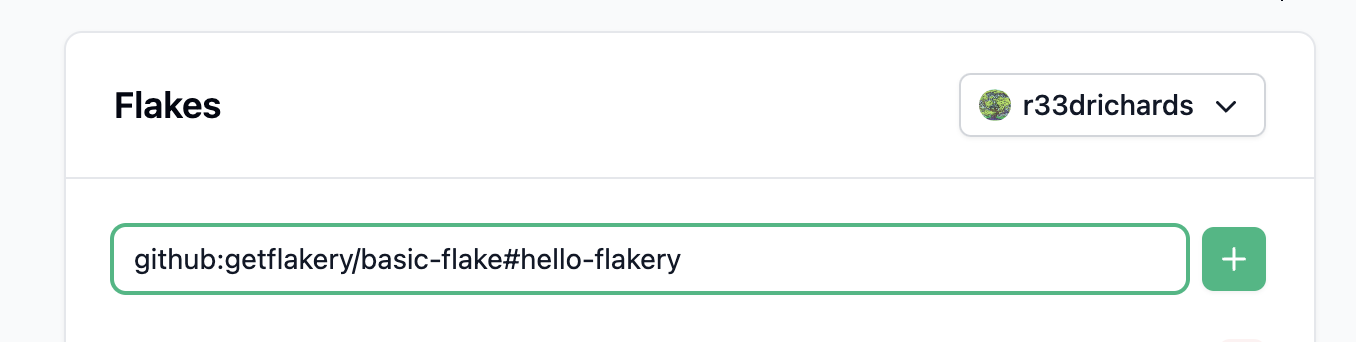
To deploy your flake on Flakery, you will need to create a new deployment. You can do this by visiting the Flakery website (opens new window) and adding your flake to the input field. the url should look something like this: github:$YOUR_USERNAME/basic-flake#hello-flakery.
TIP
Replace $YOUR_USERNAME with your Github username.
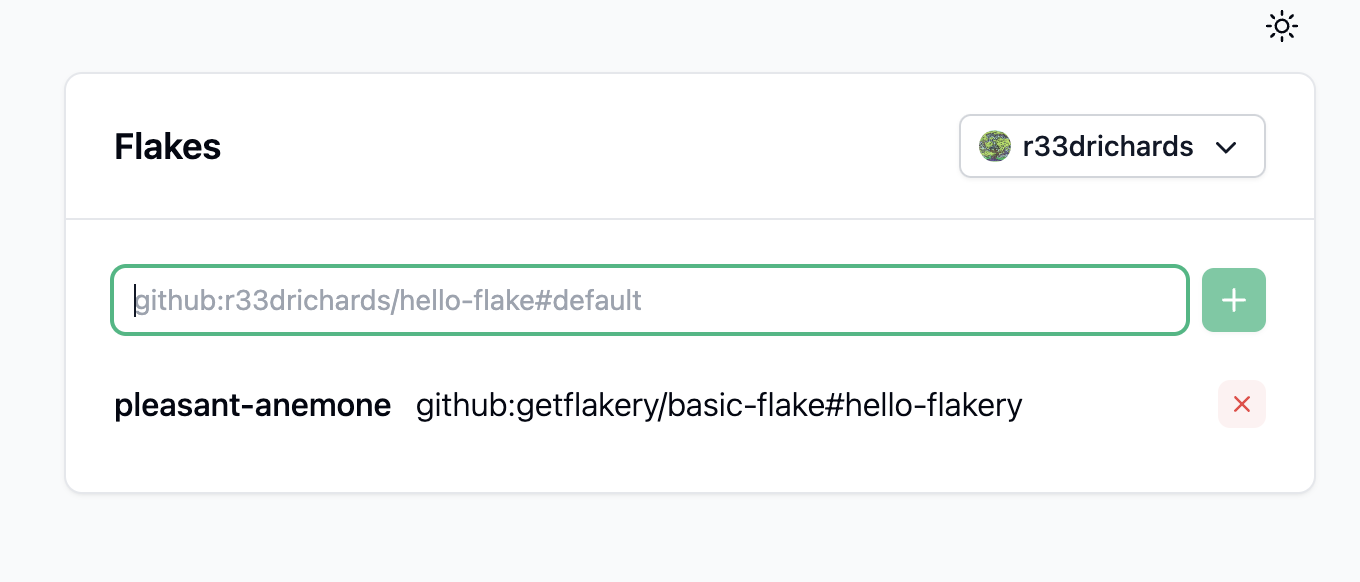
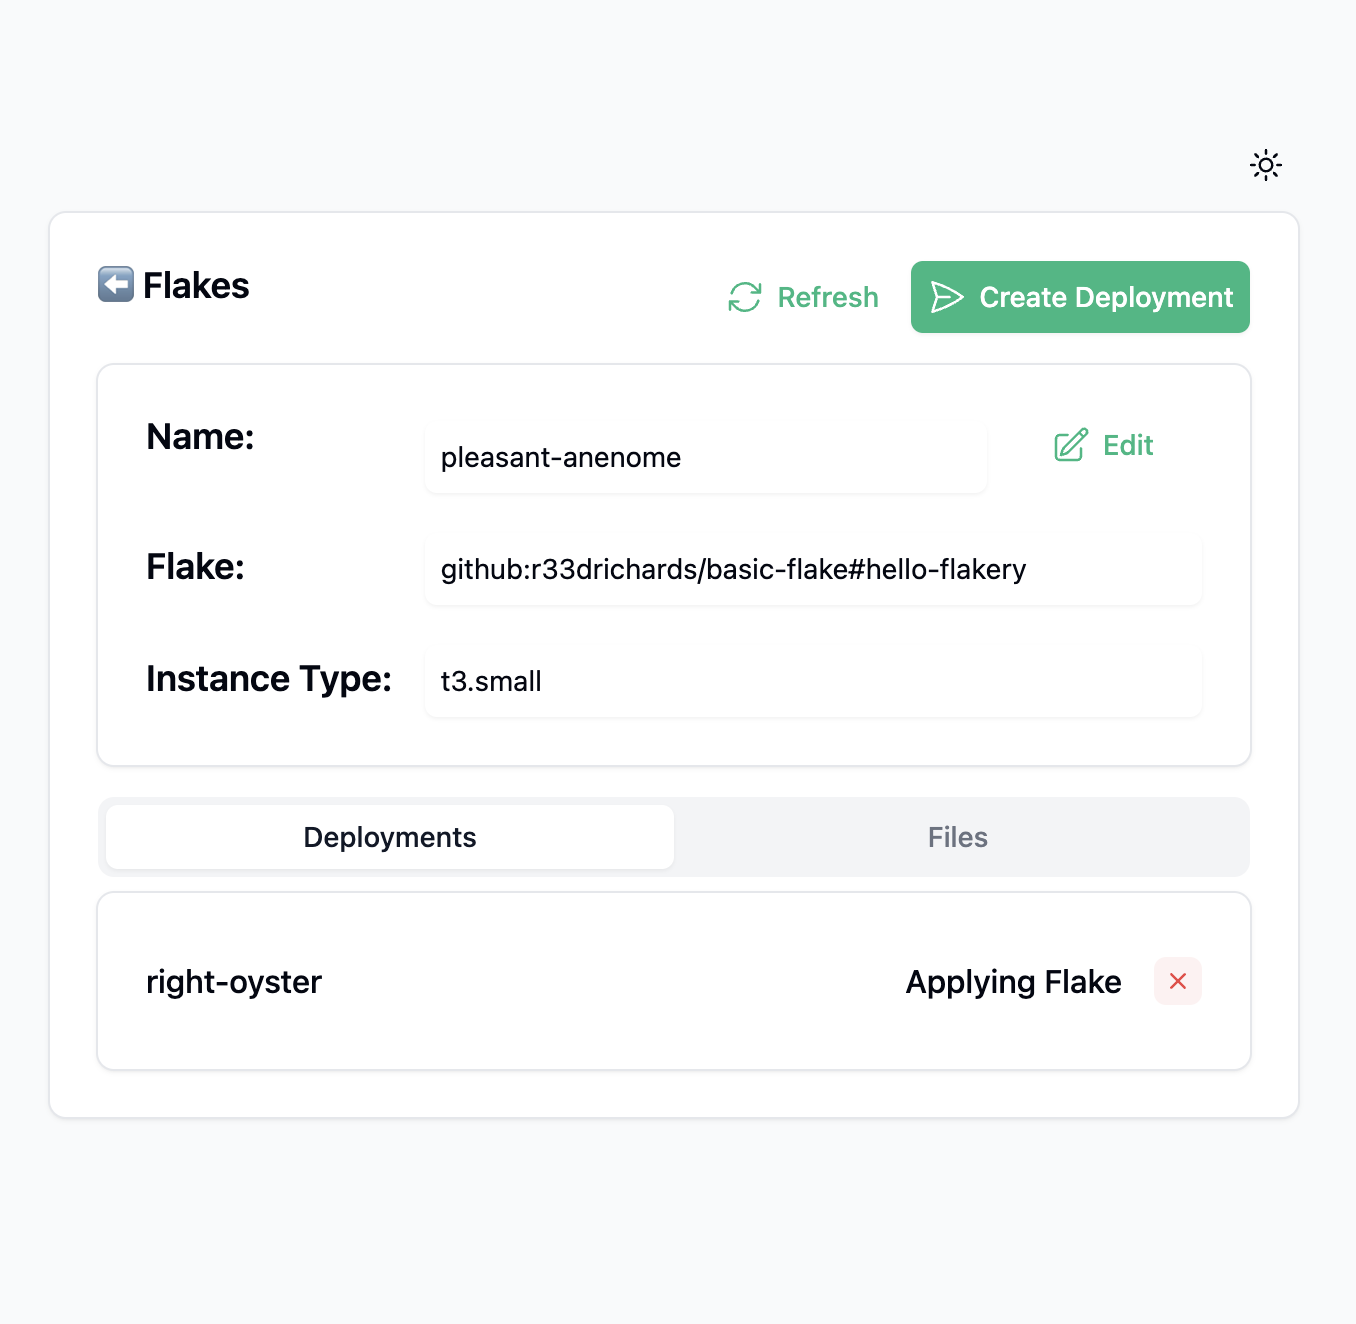
Once you have added your flake, it will appear in the list of available flakes. You can click on the flake to view its details.
Once you have added your flake, you can click the "Create Deployment" button. This will create a new deployment of your flake.
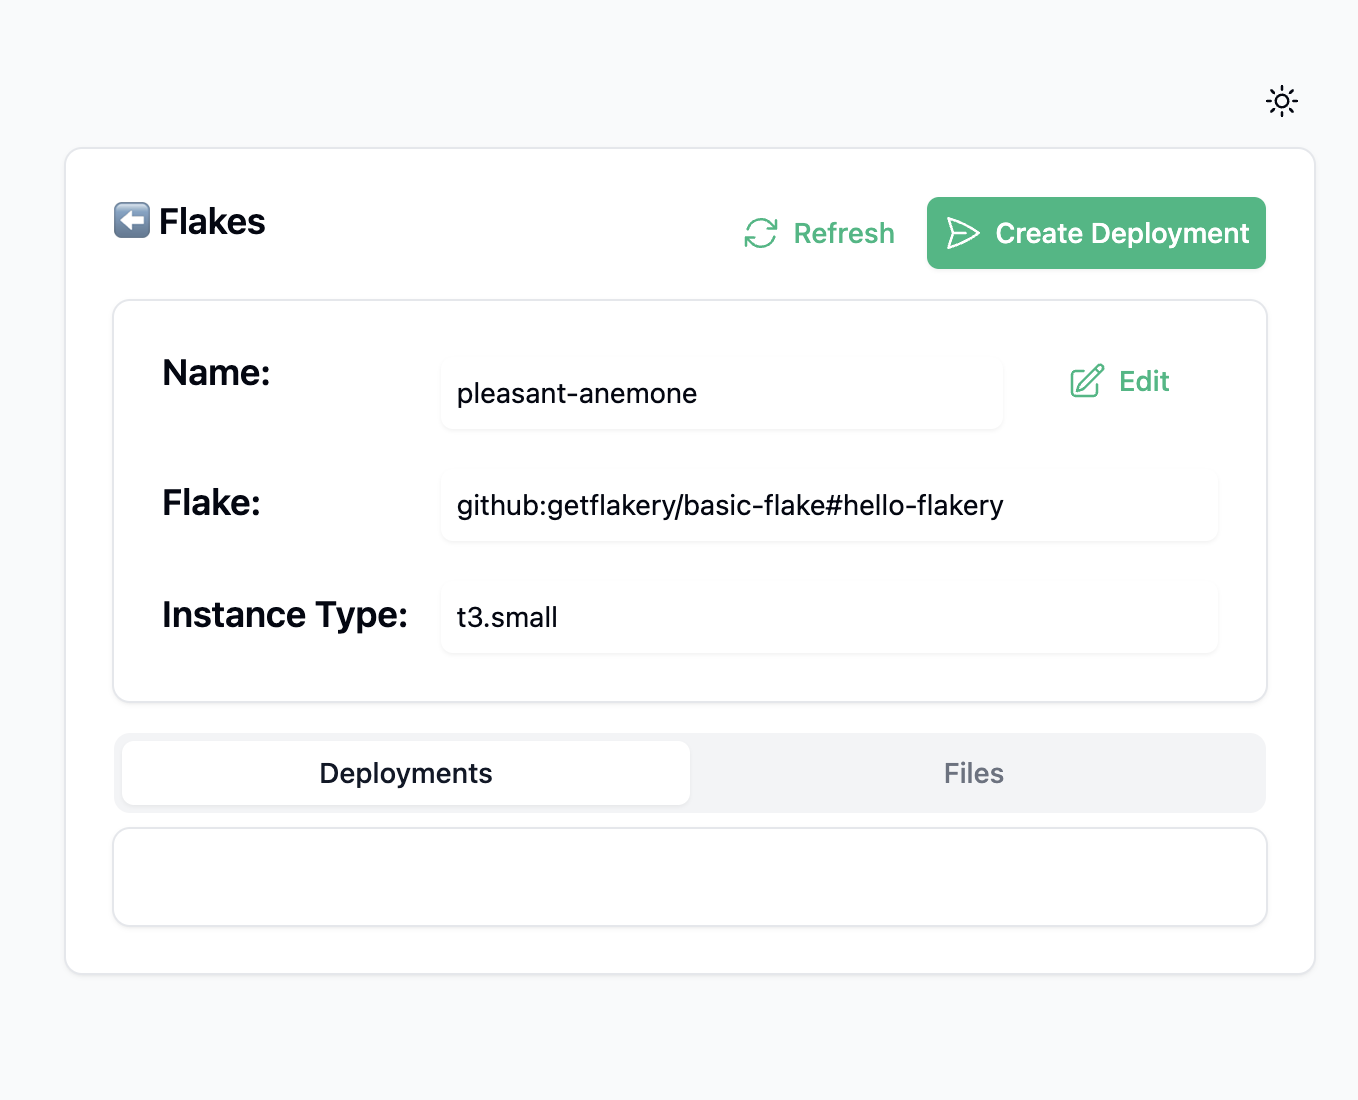
after creating your deployment, you can view the details of your deployment.
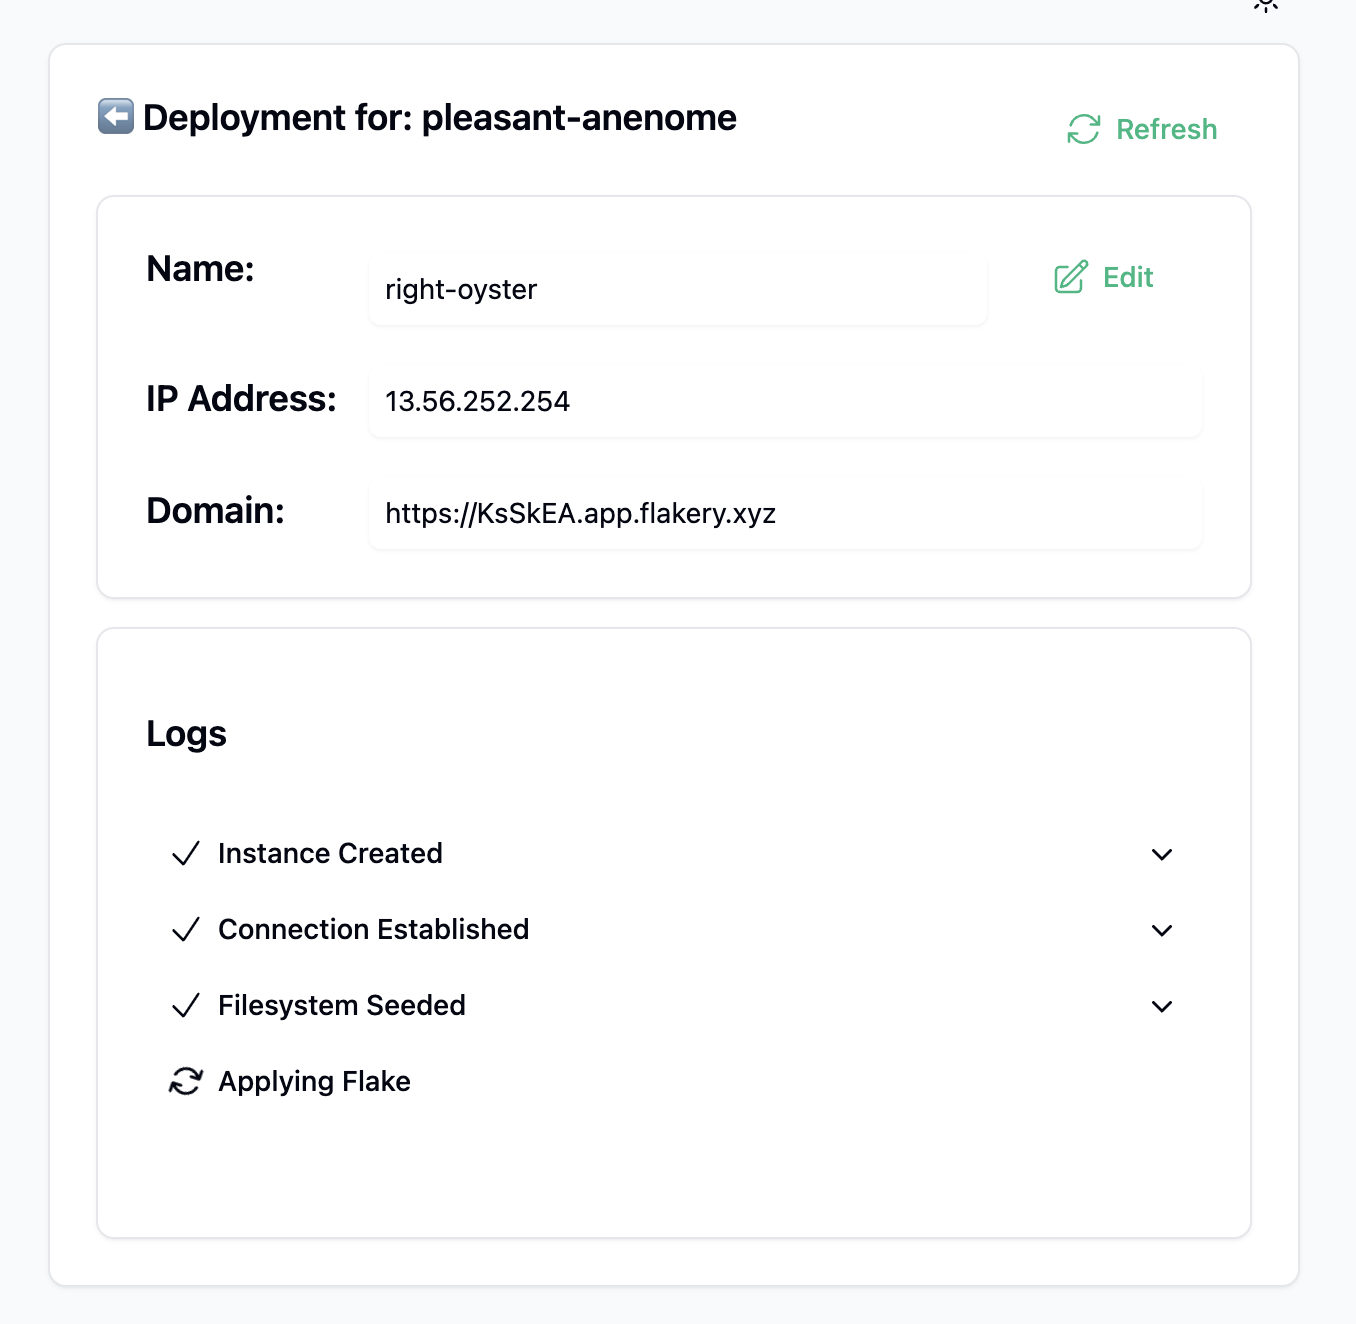
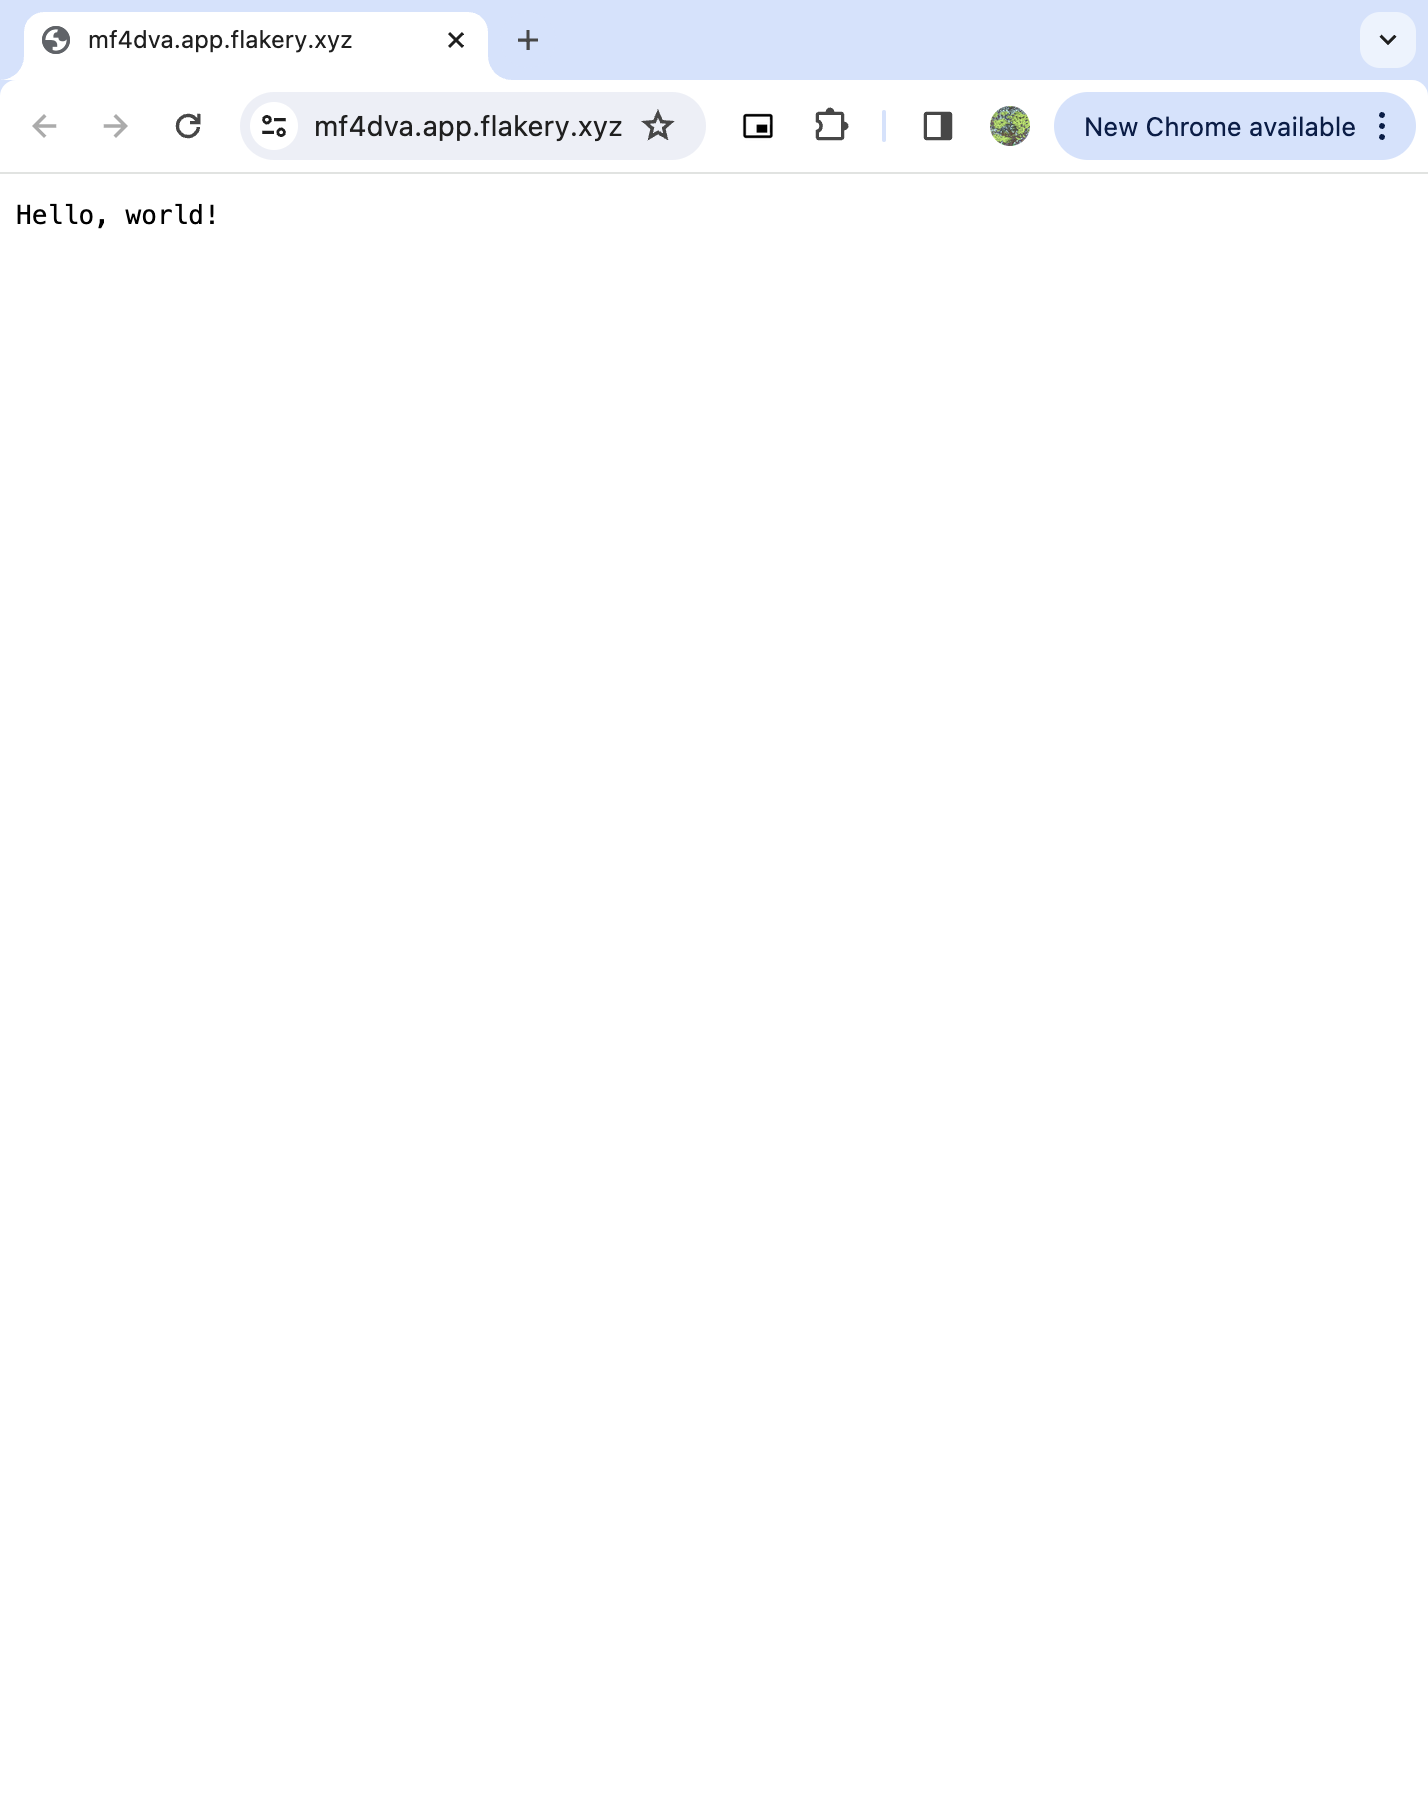
After a few minutes, your deployment will be ready. You can then browse to the URL of your deployment to view your NixOS system.
you should see a simple "Hello, world!" page served by Caddy.